Sound is a fascinating and furiously complex phenomenon that sculpts the worlds we inhabit, influencing our experiences, expressions, and environments. Engulfing us with its invisible hands, it has the power to soothe the soul with a dulcet melody, rush adrenaline with thunderous beats, or amplify tension with an eery silence. What we perceive as mere noise is, in essence, a dance of sound waves spiraling through space and time, interacting with surfaces, manoeuvring corners, and ranging off different material textures. This intricate waltz brings about phenomena like room reflections, echoes, and acoustic interference – the enigmatic characters of our sonic narratives. This exploration will chart the journey of sound waves, delve into the anatomy of acoustic interference, and identify ways to mould our rooms into more acoustically pleasing habitats – making subtle changes that can transform our auditory experiences, whether we’re hobbyists, music enthusiasts, or everyday listeners.
Understanding the Basics of Sound Wave Dynamics
Beneath the thunderous crescendos of a symphony, beneath the resonant vibes of a rock concert, and even beneath the soulful tones of a Sunday choir, there exists a world unseen, a symphony of movements, vibrations, and forces. This is the world of the physics of music. Peel back the exterior aesthetics of music and discover the beautiful scientific world that quietly brings to life all the notes we cherish. The rhythms, beats, harmonics, melodies, all magical painting in the canvas of our ears, owe their existence to exquisite laws of physics that choreograph this mesmerizing dance of vibrations. Understanding the science behind the art of music isn’t simply helpful for musicians, engineers, or technicians. It offers deep insights into the very nature of sound and, ultimately, our perception of music.
Consider this: When a guitarist strums a chord, it isn’t magic that sends wonderful vibrations through the air. It’s a complex interaction between force, tension, and vibration. The strings, each tightened to a different degree, vibrate at distinct frequencies when plucked, creating unique sounds. This is the magic of physics at play, translating tension and vibration into the tunes we love to jam to, dance or even shed a tear.
At the heart of it all is a phenomenon called “sound waves,” bundles of kinetic energy that travel from the source of the sound, like a piano or a drum, to our ears. The variations in tone we identify in music are fundamentally changes in wave frequency: greater the frequency, higher the pitch. Not forgetting harmonics, the secret ingredient behind a rich musical sound, which involves multiple frequencies playing at once. Essentially, harmonics are “resonant frequencies,” the frequencies at which an object naturally vibrates.
The physics of sound also reveals why a guitar sounds different to a flute, even when playing the same note. This particular wonder lies in the realm of timbre, the aspect of sound that allows us to distinguish between different musical instruments. Timbre is a complex blend of several frequencies produced together, molded by the materials, size, and shape of the instrument, illustrating again the intimate bond between music and physics.
Why does this matter? Well, by acknowledging the components of physics present in music, one can cultivate a deeper understanding and appreciation for the art in its entirety. It’s a mingling of art and science that seems as unlikely as it is inseparable. Imagine the charm of watching a ballet dancer when you know the forces, accelerations, and balances that make each graceful movement possible. Just like that, understanding the physics behind each vibrating string, each crashing cymbal, and each booming bass, enriches the connection with the music.
The physics embedded in music also plays an essential role in pushing the boundaries of sound technology. From the development of acoustic architecture, ensuring concert venues have the perfect sound, to the creation of intensifying surround sound systems and noise-canceling headphones; all these innovations that upscale our musical experience stem from understanding the principles of sound.
There is a rhythm and harmony in the world of physics, intertwined inseparably with the world of music. So the next time you’re swept away by a soaring melody or a pulsating bassline, remember the silent serenade of physics echoing beneath, painting this captivating masterpiece we call music.
Acoustic Interference: Refractions, Reflections and Echoes
The Invisible Intruders of Pure Harmony – Room Reflections and Echoes Explained
The symphony of music is a delicate dance between silence and sound. When every note hits just right, the collective resonance works its magic, stirring emotion and painting pictures in the mind’s eye. However, this lyrical ballet is delicately balanced; a step out of place can mar the spectacle, pulling you off the suspended disbelief that the music has drawn you into.
The unseen characters in this musical performance are room reflections and echoes; they play a more significant role than you might think. They filter, amplify, or degrade our magical resonance, sometimes ruining the dance before it has a chance to unfold.
Room reflections are the rogue notes that bounce off walls, ceilings, and floors, reaching an audience’s ears after the direct sound from the musical source. They are the products of your room’s acoustics, the complex phenomenon that dictates how sound behaves in a specific environment. When these reflected sounds interact with the direct sound, they can cause constructive interferences leading to unexpectedly louder sounds, or destructive interferences resulting in phase cancellation and dead spots. The end result: a murky and distorted faithfulness of what was initially an exquisitely composed tune.
Echoes, on the other hand, are musical ghost-notes. They are delayed reflections of the sound that reach the ears so late that they are perceived as unique repetitions of the original sound rather than part of it. Life within echoes might feel like stepping into another reality, which is seldom conducive to a captivating musical experience.
Both room reflections and echoes can play a variety of roles, either villainous or heroic. In the breathtaking legato of a violin solo, they might act as detractors, muddying the clear tone. Meanwhile, in a powerful choir piece within the hallowed halls of a cathedral, these same culprits might enhance the sound, creating that heavenly resonance.
But what can be done when room reflection and echoes conspire to wreak havoc on a sonic masterpiece? Sound treatment techniques, such as bass traps, diffusers, and absorbers, help subdue these unpredictable variables. Implementation of soundproofing materials and strategically designing a room’s layout are also effective methods to sculpt the acoustics, ensuring it complements, rather than hinders, the musical experience.
It’s a delicate balance, and the onus of creating optimal auditory environments typically lands on the shoulders of audio professionals. They are the intangible conductors, curating spaces that allow the pure, undeterred melody to shine through.
In closing, next time you sit down to revel in your favorite tune, contemplate the invisible dance occurring between room reflections and echoes. Acknowledge the dynamic interplay of this unseen ballet, for in the embrace of its unpredictability and sporadic beauty, a deeper respect for the art of music is forged.
Soundproofing and Acoustic Treatment: Solutions for Room Echo
Stride into any majestic hall, gaze up at towering walls, sense the air vibrate and you’ll feel the invisible pulse of a hush.
Whether you’re in a giant cathedral or a humble attic, one universal constant remains — sound isn’t just about what’s been played or sung; it carries an intimate relationship with the space it inhabits.
Echoes, as we’ve come to know them, aren’t just mere repetitions but intimate whispers of the room articulating its soul.
Profound reflections of sound can both be a melodic boon or a sonic ban – the invisible virtuoso or the unseen villain.
In large spaces, such as churches or grand halls, the reflection becomes the ethereal echo that lends choral melodies an otherworldly charm.
Yet, in smaller spaces such as a cozy living room or a basement recording studio, these reflections can distort sound, turning an exquisite aria into a jumbled cacophony.
Room acoustics isn’t just a vague concept to be brushed aside, but a crucial ingredient to perfect the musical recipe.
Sound absorbing materials, diffusers, bass traps and reflection panels can be the sorcerer’s stones, turning discordant abodes into harmonious havens.
Strategic placement of these sound treatment tools not only carves a path for optimal sound quality but also shapes and massages the sonic personality of the room.
Look at a concert hall, swaying in quiet anticipation, everyone eagerly beckoning one thing—a pure and crystal clear sound.
This curation of the ambiance-driven by room acoustics – is oft times the brainchild of a group of unsung heroes, the audio professionals.
Heroes who master the art of bending, twisting and reflecting sound waves around a room, creating nothing less than a sonic Picasso.
Imagine this: the hum of low frequencies vibrating your heartstrings, crystalline high notes tickling your skin, and every note in between seeping seamlessly into your senses, all while the room cradles the melody.
It’s this kind of experience that makes room acoustics an essential part of the symphony, the unseen conductor maybe, guiding each musical note to its spot in the orchestra of your auditory experience.
Indeed, the acoustics of a room can be improved, manipulated and mastered to elevate the auditory experience.
A well-planned, calculated, and implemented acoustics treatment can give the room its voice, its musical identity.
It allows us to shape and design a world that is much more than the sum of its visual elements but bridges the unspoken, unseen, and unheard; a mystical world that hums, resonates and sings with music.
The ballad of acoustics and music is a timeless one that continues to inspire, teach and liberate. Let’s keep the music playing and nary forget the melody of the room where it plays.
Case Study: DIY Acoustic Treatment at Home
Come away now on a journey into the vast world of acoustics. In your dedicated music spaces, have you ever truly considered the symbiosis of sound and space? This relationship, when understood, can open the door to a level of aural pleasure and satisfaction that was previously unfathomable.
With that said, reflections and echoes might sound like phenomena you’d come across in a physics classroom or a stretch of the Grand Canyon, but they actually play pivotal roles in our musical experiences. And no, you don’t necessarily need an advanced degree to understand them. When sound waves bounce off walls and ceilings, this creates reflections, adding depth and fullness to musical notes. Conversely, multiple reflections can cause echoes, potentially obscuring or muddying the original sound, thus impacting the overall quality.
Fortunately, artists and audio professionals aren’t left to the mercy of these reflections and echoes, as diverse range of sound treatment techniques available can be used strategically to shape the sounds we hear. Dampening materials like diffusers and bass traps manipulate reflections, absorbing, scattering, or diffusing the sound waves. This nuanced play between dispersion and absorption creates the ideal acoustic setup – the sound of silence, that wonderful absence of echo or reverberation, allowing the pristine sound to reach our ears untainted from any signal degradation.
There can be no doubt that room acoustics significantly shape the auditory experience. Next time you attend a live gig, an orchestral performance or even a vinyl session at a friend’s place, take a moment to consider the environment. The manipulation of room acoustics can make notes seem ethereal, vocals sound more poignant, and that one resonating guitar strum to forever echo in your memory. The impact is so profound that often, renowned establishments are sought after, not just for their stellar line-up, but for their immersive sound experience. It is the responsibility of audio professionals to masterfully curate these spaces for optimal musical exploration.
Drawing a parallel to another facet of life – think about how you outfit your home. The furniture and aesthetic elements chosen are a reflection of self, shaping your living environment to express your individuality. It’s the same with acoustics. Your acoustic choices have a strong bearing on the identity and aura of the music and venue. Whether it’s the heartfelt imperfections of a garage band, the rich acoustics of a cathedral choir, or the precise studio-produced sound, the setting becomes a part of the music, resonating with the emotional chord it strikes within the listener.
Music and acoustics have danced hand in hand throughout history, each influencing and shaping the other over time. Acoustic treatment is not just a passion project but an immersive journey of exploration. From understanding the nuances of sound manipulation, reflections, echoes and timbres, to creating an environment that holistically enhances the musical experience. By taking control of the acoustics in your own home, you can create a space that allows music to exude its emotion, texture, and character in the purest form.
Indeed, it’s a brave new – yet aesthetically old – world we’re stepping into. By embracing the power of acoustics, we move closer to sound. And it’s right here – in our living rooms, antiquated attics, cozy basements, we can kindle that sweet symphony of sounds, simply by understanding the science behind the art and implementing sound treatment appropriately. So, let’s dive into the deep end, absorb the rhythms, echo the resonances, and tune our lives to the wonderful world of music. As Leonard Cohen wisely shared, “There’s a crack in everything, that’s how the light gets in.” Acoustics is the eye, lets the music in.
Traversing through the circuitous landscapes of sound dynamics, we engaged in a profound dialogue about acoustic interference, room reflections, echoes, and their inherent mysteries. It’s fascinating to ponder how subtle changes in our surroundings can influence the symphony of sounds around us. From understanding these complex dynamics to initiating practical methods of acoustic treatment, soundproofing for echo control, and deciding the placement of a simple bookshelf – all subtly transform the soundscapes around us, enriching our aural experiences. As we keep exploring and experimenting within our sonic habitats, it’s a journey of enriching our auditory palette, creating immersive soundscapes, and embracing the sounds of silence. Remember – every corner, every surface, every room has its unique sound. It’s about tuning in, listening, and harnessing the perfect acoustics!
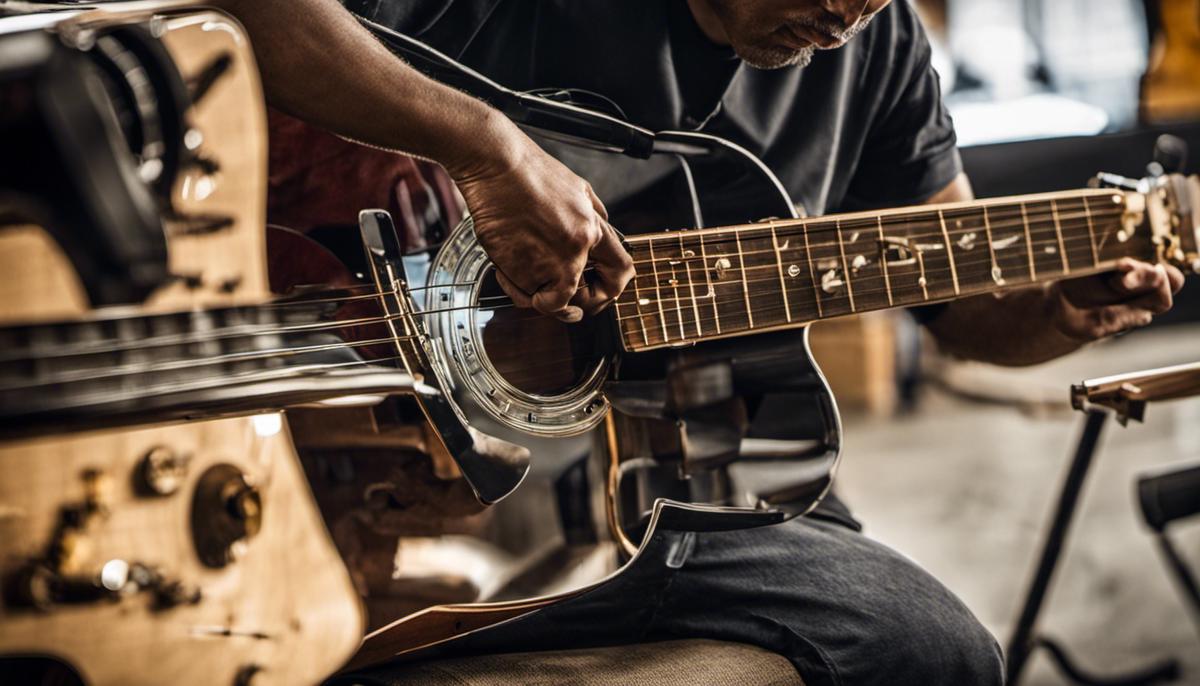
Experiencing your guitar’s delightful chords and arpeggios come to life is certainly a gratifying moment for any guitar enthusiast. However, every musician, whether a novice or a seasoned player, is all too familiar with the unexpected guitar sound woes that can creep in, tainting this beautiful moment. From pesky string buzzing, temperamental intonation issues, unsettling electronics troubles, every part of your beloved instrument can contribute directly to the quality or problem of your guitar’s sound. This comprehensive guide will explore ways to identify these issues, delve into simple maintenance and setup procedures aimed at restoring the guitar’s sound integrity, and introduce basic principles of sound engineering, which not only help troubleshoot but also enhance the overall sonic output.
Identifying Guitar Sound Problems
Strumming Through Troubles: Addressing Common Guitar Sound Issues
As a conduit of harmony, a guitar is more than an instrumental wonder; it is a vessel that carries the melody of the soul. Just as the voice of a singer expresses a broad spectrum of emotions, the resonating sound of a guitar strings vibrates into the hearts of listeners, awakening shared feelings and creating intimate connections. To keep these emotions flowing, it’s key to understand and address the common issues that can affect the sound of a guitar.
The sheer allure of a guitar plucking a melody is reliant on its proper maintenance, akin to a well-tuned orchestra. The secret often lies in the very heart of the instrument – the strings. They are the primary source of the sound and are, therefore, predominantly the ones to blame for any discrepancies. Changing guitar strings is an unrivaled ritual among the musical community that ensures optimal sound quality, and should never be overlooked.
However, issues may run deeper than the surface. Intonation, the accuracy of pitch in playing, is an essential aspect to consider. Sometimes a note may sound off even when the guitar is perfectly tuned; this could be due to improper intonation. Regularly checking this, and potentially getting it professionally fixed if a problem emerges, ensures the soulful symphony continues without disruption.
Beyond intonation lives a less conspicuous yet influential contributor to the quality of sound: the guitar’s action. Action refers to the distance between the strings and the fretboard. A high action may result in a buzzy or muted sound as it becomes tougher to press the strings down onto the frets correctly. Conversely, an exceedingly low action might cause the strings to buzz against the frets. Finding an optimal balance is a delightful dance between comfort and sound.
Guitar pickups also play a considerable role in the symphony of strings, especially when electric guitars are at the forefront. Guitar pickups are magnets that capture the strings’ vibrations and convert them to an electrical signal—any fault or misalignment in pickups alters the sound drastically. Thus, routine checks and maintenance are undeniable constituents in the recipe for seamless guitar sounds.
The art of playing the guitar is a symphony of strings that create a harmony of human emotion, encapsulating the spirit of music in its purest form. Understanding and addressing the common issues that can affect the sound of an instrument are the keynotes to ensure the music continues to resonate, inspire, and evoke. Indeed, as with any art form, for the sweet sound of success, one must tune in to the minor details. Radiate the beauty of sound; take charge of your guitar’s melody, and let the world listen to your unspoken verse.
Guitar Maintenance and Setup
Maintaining the Heartbeat of Music: How Regular Care Transforms the Guitar’s Tone
Delving into the harmonious world of music, a strumming guitar forms a rhythm that guides the orchestra, a pulse that brings people together. Just as a virtuoso knows every cadence, every note, and the subtle nuances of their chosen instrument, so too should they understand how meticulous care and correct setup profoundly impacts the guitar’s overall sound quality.
An overlooked aspect of guitar accuracy and sound quality is the instrument’s truss rod. Found in most guitars, the truss rod controls the amount of bow in the neck. This adjustment directly influences the guitar’s pitch accuracy, particularly in the midrange of the fretboard. Defects in the truss rod can cause fret buzz, loss of sustain, or intonation issues, which drastically decreases the resonating beauty that one seeks from the guitar strings.
Moving on to an often underappreciated region of the guitar: the nut and saddle. In simple terms, the nut guides the strings onto the fretboard from the headstock, while the saddle does the comparable job at the bridge. Both the nut and the saddle play key roles in the guitar strum’s precise tone. Materials vary widely – from bone to plastic to graphite – each lending a different tonal fingerprint to the guitar’s voice. Erratic wear or improper setup can lead to detuned guitars and sub-optimal sound quality – the perfect antithesis of true music lovers’ passions.
Feel the grooves of the frets under your touch, the places where fingertips linger and let out the melodies that make hearts soar. Faulty or worn-out frets not only hinder performances and cause physical discomfort but also profoundly affect a guitar’s pitch and overall tone. Regular care of the frets, including proper leveling and dressing, prevents buzzing and ensures clear, beautiful tones at every fret.
Amplifying the acoustic resonance in electric guitars, the potentiometers and capacitors are akin to the conductor directing the opera. They modulate the voltage passing through the guitar pickups, allowing a bespoke shaping of high-frequency response and overall output. Inconsistent performance or rusting can significantly affect the robustness of tones produced.
A proper setup and diligent maintenance of a guitar can be likened to offering love and respect to your fellow band members. Beyond functionality, these acts enhance creativity, enabling musicians to compose and deliver astounding symphonies that touch the soul. To seek quality sound, one must give quality care. From the truss rod to the frets, potentiometers to capacitors, every guitar component is part of a complex symphony, all working in unison to produce captivating music, the universal language that unites hearts – a beautiful tribute to the time-honored tradition of song and rhythm.
Sound Engineering Basics
Guitars, in their captivating resonance, offer a limitless repertoire of melodies that touch the soul.
Each guitar, analogous to a distinct voice, holds the potential to express an array of emotions and stories through sound. Impeccable sound recorded from a guitar isn’t just a product of competent craftsmanship and maintenance, ending on the application of sound engineering techniques.
One fundamental technique vital in yielding superior guitar sound during recording is exploiting microphone positioning. The placement and arrangement of microphones can significantly affect the final recorded tone. The tried-and-tested technique of close-miking captures the direct sound of the guitar’s speaker whilst reducing the influence of room acoustics. Employing a multi-mic technique allows the blending of different tones to create a more complex and rich sound. An appropriately distanced room mic can also capture the sonic character of the room, adding depth to the recording.
Directionality of microphones also plays an indispensable part. Directional condenser microphones or dynamic microphones pointed towards the center of the speaker can capture more bright, clean tones. On the other hand, aiming towards the outer edge of the speaker yields warmer, smoother tones. Using a combination of the two can balance the brilliance and warmth in the guitar sound. Equalization (EQ) is a powerful tool that aids in smoothening the frequency response of the guitar in a mix. However, it’s imperative to use EQ judiciously, as excessive EQ could lead to a loss in the natural harmonics and character of the instrument.
While recording, removing extreme low frequencies (cutting high-pass filter) can reduce unwanted noise. Boosting or cutting certain frequencies can emphasize or downplay certain features of the sound. A key component of amplifying the guitar’s tone is the usage of compression. Compression enables control of the dynamic range, making loud parts quieter and quiet parts louder, creating a balanced and controlled sound output. It’s crucial to use compression moderately to maintain the natural dynamics and articulation of the guitar performance. Another magical tool in the sound engineers’ box is the reverb. With its capacity to simulate spaces, reverb can add an engulfing ambience to the guitar. Different types of reverb yield different textures and environments for the guitar sound, from a small room to a large hall.
Lastly, the power of testing and experimentation must never be underestimated in guitar recording. Changing the guitar, using different picks, adjusting the player’s technique or attempting different amp settings can all contribute to the end result. There’s no singular absolute method; it always depends on the specific sound one is aiming to achieve. Hence, the alchemy of stellar guitar recording is a fusion of technical understanding, keen listening, and creative experimentation. Sound engineering strategies like microphone positioning, prudent use of EQ, compression and reverb, and continuous experimentation can elevate the guitar’s sound from ordinary to extraordinary, enabling the guitar to narrate captivating tales in its entrancing language of melody.
Mastering your guitar is not only about possessing the finesse to play intricate solos or complex chord progressions. It also includes understanding and troubleshooting any sound problems that may arise, compromising the beauty of your performance. Through regular maintenance, a fair appreciation of the guitar setup, and acquainting oneself with some vital sound engineering basics, you can ensure that your recording sessions encapsulate the very essence of your guitar’s true sound. Initiating a recording with sound issues could potentially degrade the entire recording process. In contrast, a well-maintained instrument, coupled with astute engineering basics, promises rewarding results- it’s worth all your dedicated effort and painstaking tuning. So, keep those strings in harmony, ensure your frets are in top shape, and master the sublime art of sound recording, cementing your place in the awe-inspiring world of music.
Cole: I always gave into the concept that if you recorded at higher sample rates then it sounds better. Some people I considered to be good engineers actually said if you can record 96khz then do it. If you don’t mind me asking how did you come to the conclusion of keeping the sample rate of your sessions at 44.1khz instead of using higher sample rates like 48, 88.2, 96khz? From what I know, you can’t record both at 48khz and 44.1 at the same time so it would be a bit difficult to a-b the two right?
Its kinda difficult to explain and also really depends on what kind of project you are working on. Certainly their are situations that warrant recording at a higher sample rate. But, 90%-95% of the time when recording, especially in genres where live instrumentation isn’t really used or needed, it is better to remain at a sample rate of 44.1khz. To help explain, first, i think it’s best to fully understand what digital audio really is.
So, essentially you have to think of digital audio as the summation of a lot of math equations, those equations coming from the process of converting an analog signal to a digital signal or what is commonly known as A/D. The architecture of those equations are determined by both sample rate and bit depth, which i’ll explain shortly. The final sum of those equations (which we call an audio file) is never quite a perfect answer, its always some kind of number with a lot of decimal points to it.
What makes the math imperfect is the fact that the sum is usually a number that is a rounded result from all the equations occurring in the process to convert an analog signal to a digital signal. The accuracy of the mathematics occurring is determined by the quality of the A/D process done by a device called the A/D converter, which you would also know as your Audio Interface. Depending on the actual quality of your A/D converter, the amount of decimal points that the sum will assume can either be short or an extremely large value. Top of the line A/D converters, the ones that cost as much $12 grand and higher, round out the sum of these math equations to a trillion or more decimal places, which means the sum is going to be a lot lot more accurate and detailed. Low end A/D’s round out these equations to a few hundred or thousand decimal places, so the sum is just not going to be as accurate and detailed.
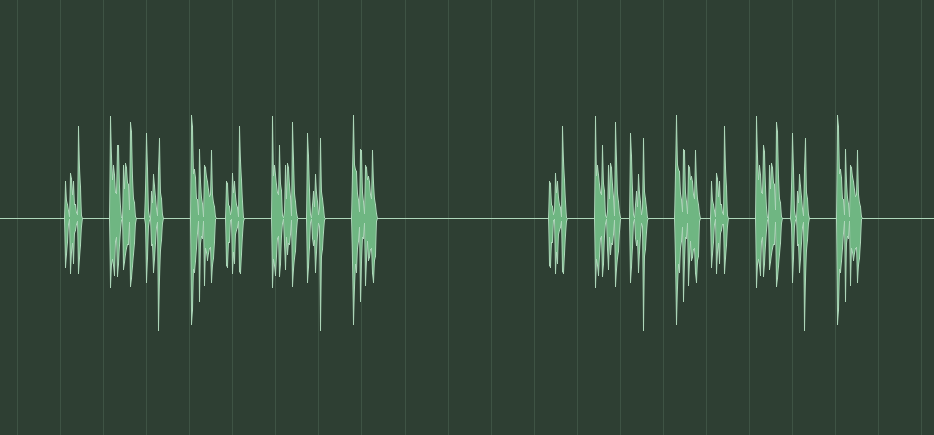
So what exactly is ‘the sample rate’? In a comparative ‘simple’ explanation, it essentially is a consecutive series of snap shots over a specific duration of time like a video or motion picture. But we’re not talking about video, we’re talking about audio. What defines the sample rate is how many of these snapshots of audio occur in the duration of 1 second as well as how consistent the interval between each snapshot is. So what 48 khz really means when you break that number down is that their is 48,000 snapshots of audio in 1 second. 44.1 khz means that their is 44,100 snap shots of audio in 1 second.
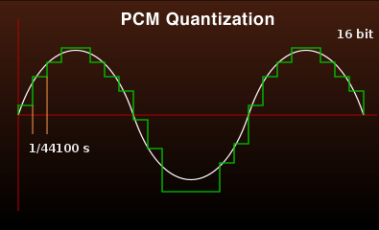
It’s also helpful to understand what ‘Bit Depth’ is as well in this conversation. Once again, to make a comparative ‘simple’ explanation, ‘Bit Depth’ represents how detailed each one of these snapshots are, kinda of like the amount of colors in a photograph. Black and white photos represent the lowest bit depth, and photos of many millions of color combinations represent the highest bit depths. Once again, since we’re not actually talking about photos, the details we are talking about in each snapshot of audio is decibel level steps in the frequency range of human hearing, which is between 20hz-18,00khz.
16 Bit audio has 65,536 steps while 24 Bit audio has 16,777,216 steps. Essentially, 24 Bit audio has 256 times the number of potential amplitude steps as 16 bit audio.
Now that we roughly know what digital audio, sample rate and bit depth are in terms of how they are defined, we can go back to your original question about why i mostly choose to record and work in a 44.1khz, 24 bit format as opposed to a higher sample rate and bit depth in our DAW.
You have to think of the A/D converter as essentially a sonic camera. You can kind of compare recording digital audio through different quality A/D converters to animating photographs from different kinds cameras. A really top end camera is going to take a high detailed snapshot, and obviously a cheaper consumer camera is going to take slightly less detailed snapshot. If you were to take 48000 snapshots in a row super quickly and animate those snapshots, its pretty clear that the animation of the snapshots from the top end camera is going to look way better than from the animation of the snapshots taken from the consumer camera. The same would apply if you were to take 44100 snapshots.
So now in the conversion process of converting audio from 48khz to 44.1khz, essentially we have to remove 3900 snapshots of audio to get from 48 kHz to 44.1 khz. But which snapshots are we going to remove? And when we remove those snapshots, what happens to all that extra space that was now created. The interval between each snapshot is not going to be consistent anymore. It would go something like, snapshot snapshot, missing snapshot, snapshot snapshot, missing snapshot instead of just snapshot after snapshot after snapshot. Because we had to remove those 3900 snapshots, if you were to animate the remaining 44100 snapshots back what you would see back is going to be less smooth and consistent. Totally not representative to what the animation of 48000 snapshots would look like because the intervals between snapshots wouldn’t be the same. So essentially converting audio down from 48khz to 44.1 means you are removing information from the 48khz file to make it a 44.1khz file. Anytime your removing information from an audio file like that, the end result is not going to be the same as the original audio file, even if its only the slightest of differences.
So thats why i keep everything at 44.1, so i’m not losing any tiny pieces of information from the audio file in the conversion process. Hope this is somewhat understandable.
9 times out of 10 in the studio, the most frequent question we get asked on an everyday basis would have to be “what are you doing to the vocals to make them sound so good in the mix?” Sometimes clients word it a little differently, but it all leads back to the same question
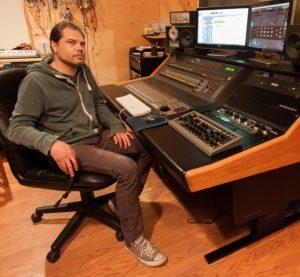
Here at Studio 11, we mix a new rap vocal anywhere from four to six times a day — much more if there are multiple rappers on the same track. Over the years recording and mixing rap and hip hop in Chicago, we have developed an approach that genuinely works, and works extremely fast. In fairness, we understand that all songs, their track makeup, vocal styling and performance can be quite different. Truthfully, there can never be one formula to mix all vocals effectively. In the genre of rap and hip hop, there are many approaches to conceptualizing a vocal treatment. Ours is just one of many.
The Approach
It all starts with the approach. We say this time and time again, and every time we say it, it only gets more true: in order to mix anything music related, you need an end game. There has to be some kind of idea of what the song is going to sound like when it is finished, where the vocal is going to go sonically in the song before you start getting it there. More than likely, your initial approach can and probably will change along the way, but there has to be some kind of guiding direction or else why do anything at all.
The biggest issue most people have when mixing rap vocals is that they think of the word “vocals” without considering the word “rap.” Rap is a supremely general term — there are big differences between 1994 LA style rap vocals and 2015 Chicago style rap vocals.
The point being, when it comes to mixing vocals, the ‘what’ and ‘why’ are just as critical as the ‘how’. Important things to consider before the mix are: what is the artist’s style, where is the song being played, who exactly is the artist’s audience, and how can you, the engineer, tie all that together and bring the song to life?
So that you have an overall approach to the song, how exactly do you get it there?
Cleaning Things Up
After all the rap lead’s, overdubs, and adlibs are recorded in the song, many of them are going to need a bit of cleaning before the mix process can begin. There are many related issues that can occur during any given vocal tracking session.
One common issue we hear all the time when clients send us projects to mix is their vocal tracks were recorded in a terrible spot. One such place is the closet (we get that one a lot) or in the crapper. We know its crazy, but a legend has gone around that it’s a good idea to record in a closet or bathroom. Lets be clear, it is never a good idea. However, if a closet receives the proper acoustic treatment, it can work just fine. But only with proper acoustic treatment is it possible.
The other common problem we get all the time from our clients is that the vocal tracks were recorded too hot or are clipping. Again, a myth has persisted that it’s a good idea to record the vocal signal or any signal for that matter as loud as possible. This is completely not true, particularly in the era of 24-bit audio.
Cleaning things up can be a little rough sometimes because the capacity of what can be done to the audio in question can be quite restricted. One useful tool for audio files that are clipped out is iZotope’s distortion removal software called Rx De-Clipper.
Another thing to keep in mind is the distortion on the audio file will create resonances in the center frequencies. This can be corrected with precise parametric equalization.
For vocals recorded in reverberant spaces, subtle gating, expansion and careful equalization can contain the sound of the room — or you can use software like SPL De-Verb. Another trick we incorporate is to mix the track in a way that utilizes the reverb printed with the vocal. A good way to do this is heavy compression
For vocals recorded in closets or corners, the main issue will be comb filtering.
One simple idea we use for reducing comb filtering is if there are doubles of the vocal, pitch shift each one up or down a slight amount. This will slightly alter the frequency bands that are being filtered, so that when stacked with the main vocal, the same bands will not be missing entirely. The doubles or overdubs will “fill in” the missing frequencies. At the end of the day, the comb filtering will still be there, but it won’t be as noticeable.
Another noticeable problem we frequently get when clients send us projects to mix is that the vocals will be poorly edited, containing clicks, pops, noises, jumpy or unnatural cuts. At Studio 11, we always go through all the vocal tracks one by one and delete the dead space and fix all the editing so each performance is as smooth and natural as possible. If the breaths are real loud on the vocal track you might want to gain them down or delete them. If the vocals are stacked and there is no particular lead, the best idea is to just delete the breaths all together.
Lastly, if the artist is in the studio with you for the mix process, it might be a good idea to mention these problems to them if they exist and just rerecord all the vocals or just the ones that are in question.
The Power of Processing
Now that the vocals have been cleaned up (or maybe they came in clean to begin with), it’s time to decide what to do with them in the mix.
Now, its not really our style to tell you how you should or should not process the vocals in your mix, but we can give you a couple of pointers to consider and think about.
B-B-B-Balance
First and foremost, when it comes to mixing Rap and Hip-Hop, especially Chicago Rap and Hip-Hop, it is extremely important to understand and figure out the relationship between the vocals and other instruments that fall in the same frequency range.
Typically, Chicago Rap and Hip-Hop is all about the relationship between the level of the vocals and drums. The number one contender with the voice is usually the snare. Discovering a way to make both the vocals and the snare prominent and pocket without getting in each other’s way will make the rest of the mix fall nicely into place.
Rap and Hip-Hop vocals generally do not have much in the way of reverb.
There are three main reasons for this:
1. Rap vocals tend to hold more of a rhythmic function and generally move faster than sung vocals — long reverb tails can smear the rhythm and articulation and even dull out vocal presence.
2. Typically, the idea in Hip-Hop is that the vocal needs to be “up front and in your face,” whereas reverb tends to push things back into the stereo field.
3. All the dogs and cats are mixing vocals that way. Not necessarily an okay reason, but resonates with truth.
However, Rap and Hip-Hop vocals usually do profit from a slight sense of three dimensional sculpting, or what is known as “air.” This is a sense of space around the vocal that makes it more vivid and exciting. Very small, wide, quiet reverbs can really do the vocal a lot of justice here.
Another thing that we do that helps out a lot is use a small amount of delay (echo), keeping it in the background, with a lot of high-end rolled off. This creates the sense of a very deep three dimensional space, which by contrast makes the vocal seem even more present and forward.
Lastly, if you are recording the vocals in a really nice professionally designed tracking room, carefully bringing out the natural space of the room on the vocal track can be a good way to add a bit of “air” and realism to super dry vocals.
Mid to heavy compression with a very fast attack, relatively quick release, and a boost to the super-treble range can often help accentuate the natural “airiness” in the vocal.
Consistency and Shape
A little compression often works well with vocals, just to tame them, place them into a mix and add a smidge of tone.
On a mix with few tracks, a small amount of compression will usually get the job done, unless you are truly going for that over-compressed sound where there is little dynamics. However, the most common error most people do make when processing Rap and Hip-Hop vocals is over-compression. Extreme levels of compression really only works well within in a mix when there is a lot of stuff fighting for frequency space. When you hear about rapper’s vocals going through three different compressors it’s probably because there are many things already occurring in the mix, and the compression is necessary for the vocals to cut through. Or because it’s a stylistic choice to really crunch the vocals and get that over compressed ‘in your mouth’ kind of sound.
Filter Cats Ho!
What’s happening around the vocals music wise is just as important to the vocals as the vocals themselves. Carefully choosing what frequencies to keep and get rid in the mix is very important in helping the vocals sit or pocket just right. For example, a lot of engineers choose to high-pass filter almost all the tracks in the mix except the kick and bass. That helps create room for the low frequency information. Often though, the importance of low-pass filtering is overlooked. Synthesizers, even bass synths, can contain a lot of upper frequency information that just isn’t needed in the mix, leaving the “air” range around the vocals feeling stuffy.
A couple of well utilized low-pass filters could very well bring your vocals to life.
Also, a little more on high-pass filtering, unless you are going for that thin mid rangy thing, you really don’t need to high pass filter your vocals past 120-130 Hz. Both the male and female human voice has chest resonance that on average goes down to 80 Hz (and sometimes even lower). Try applying a moderate high-pass filter at around 70 or 80 Hz to start with if you’re just trying to clear up the vocals. This will usually remove any microphone boom that might be on the vocal track or tracks. This will definitely your low end instruments push through the mix better too.
Presence not Presents
Deciding where the vocal sits in the frequency spectrum is important. Mid heavy vocals (telephonic sound) can be really cool at times, low-mid “warm” sounding vocals certainly have their place, add charm, and moisten panties. Most of the time, we like to hype the natural presence of the vocals through subtractive equalization of the “throat” tones and proximity buildup which generally occurs around the 230-650 Hz range. As a result, this will over exaggerate the head and chest sound— particularly the consonants that form at the front of the mouth, tongue, and teeth — which is what we use to pronounce our words. These consonant sounds generally live in the upper midrange (2k-5k).
Although these are the methods we use to get vocals to stand out in a Rap or Hip-Hop track, at the end of the day, there really is no correct way. Remember to use your ears, because as long as the client is happy and the mix sounds good and translates, then you, the engineer did his or her job. Then maybe just maybe, someone will throw you a cookie at the end of the session for a job well done. Studio 11
Whether you are a recording engineer or in the process of learning to become one, chances are you have probably heard of the drum mix technique called ‘parallel compression.’ If you haven’t, let me quickly explain. This is when the recording engineer sends the drum mix out through a stereo buss to a compressor and mixes that signal back into the original stereo mix of the song. The method of ‘parallel compression’ can either be used in an extremely subtle or overt manner by modifying the extent and character of the compression and how much of that compressed signal is sent through the stereo buss. I have found that by using this technique the drive of the drum track performance really comes alive in the mix, even during quieter passages. It gives the drums that ‘in your face’ kind of sound while still retaining a smooth listenable quality.
The results vary from just compressing the tracks because at a low level you get both retained transients and an extra sense of loudness from the compression. When the song starts to get louder, the effect of the compression applied to the bussed signal will become less prominent due to the uncompressed track’s dynamic swells that can tend to dominate the mix.
However, the technique of ‘parallel compression’ doesn’t have to be used just on drums. I discovered a similar technique for myself many years ago for vocals, only to learn that other recording engineers before me used this technique too. The reason why I decided to use ‘parallel compression’ on the vocal was I wanted the lead vocal track of the song to be articulate at lower levels while still retaining a listenable quality at higher levels. In essence, what I had created was my own form of dynamic equalization.
So, I wanted my lead vocal track to be brighter at low levels to help it slice through the mix. However, I knew adding top end would only cause the vocal to be really harsh at higher levels. Adding compression to the vocal really didn’t create the sound I was looking for, it just sounded like I was sitting in the vocalist’s mouth. A little to intimate for what was needed in the mix of the song. Also, the amalgamation of compression and high frequency boost caused the vocal track to become really sibilant, which is usually not a good thing when it comes to lead vocals. Moving the compressor to the front of the vocal chain helped a little bit, but it still didn’t provide that magical sound I was looking for.
I wanted my vocal to be brighter at low levels to help it cut through a mix, but just EQ’ing it caused it to be too harsh at higher levels. Adding a compressor to the vocal did not create the sound I had in my head. It was still to harsh at high levels and the EQ caused the compressor to react in ways that I felt were inappropriate. The combination of high frequency EQ boost and compression often causes a well recorded voice track to become sibilant. Not a good thing. Placing the compressor in front of the vocal signal chain helped, but still did not deliver the “magic” I was looking for.
The solution to my problem presented itself after a few hours of mad science and experimentation. Since I work primarily on a DAW, I decided to duplicate the lead vocal track to a second track, so in essence, there were now two lead vocal tracks. On the duplicate lead vocal track, I first Eq’d all the bottom end out by running it through a high pass filter. I then boosted the top end of the duplicate lead vocal by about 5 or 6 dbs’s. My goal was to create a vocal track that didn’t have a lot of tone to it or vowel sound, just consonants. I then heavily compressed the duplicate lead vocal track to control and push back any loud passages, allowing for the softer passages to come through. Once this was done, I mixed the duplicate lead vocal track back in with the original lead vocal track. The end result was a lead vocal track that was now easy to understand at low levels because of the extra boost in the highs, while also be pleasant to hear at louder levels because of the reduction of the highs due to the heavy compression.
Now one thing you must pay attention to when using this technique on a DAW is processing delay. It can vary a lot from plug in to plug in. An easy way to correct this problem is by inserting the same plug ins on both the original and duplicate track. You would then set the plug ins on the original track to bypass so they don’t effect the sound of the original track. If your DAW already has delay compensation built into its software, then make sure this feature is engaged.
This technique can also be done using your analog console. Buss your lead vocal to two channels on your console and then assign both of those channels to the stereo buss. Insert a compressor that has both a quick attack and release onto the duplicate or ‘articulation’ vocal track. Insert an EQ or filter on the articulation track that can high pass everything below 3khz. Set your compressor on the articulation channel to an extreme compression setting with the fastest attack and release possible. Listen to how the consonants sound coming from the articulation channel and make sure they are clean and without and tone or vowel sounds. Mix the articulation channel back into the stereo buss mix until you can noticeably hear the articulation come up at lower levels while hearing the tone change to a warmer sound during elevated levels. Mix the articulation signal in to taste.